Razorpay Onboarding
We advice you to open your Razorpay and Recur Club (Collections > Razorpay) page on two separate tabs to follow along with the set up.Add your Recur Virtual Account to your Razorpay account as a Route Account
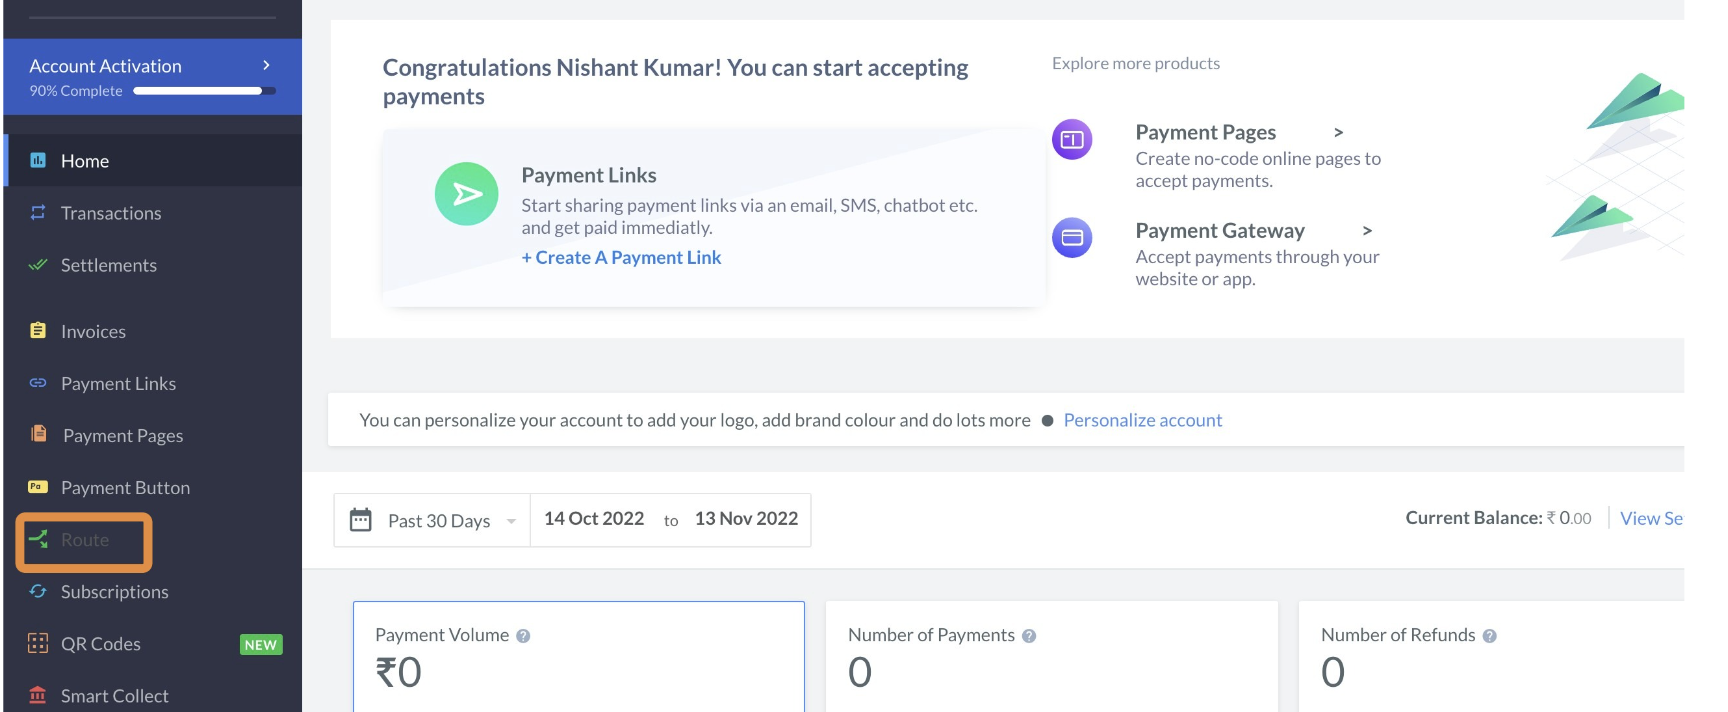
1. Navigate to https://dashboard.razorpay.com/app/dashboard and Click on "Route" in the left Navigation Bar.
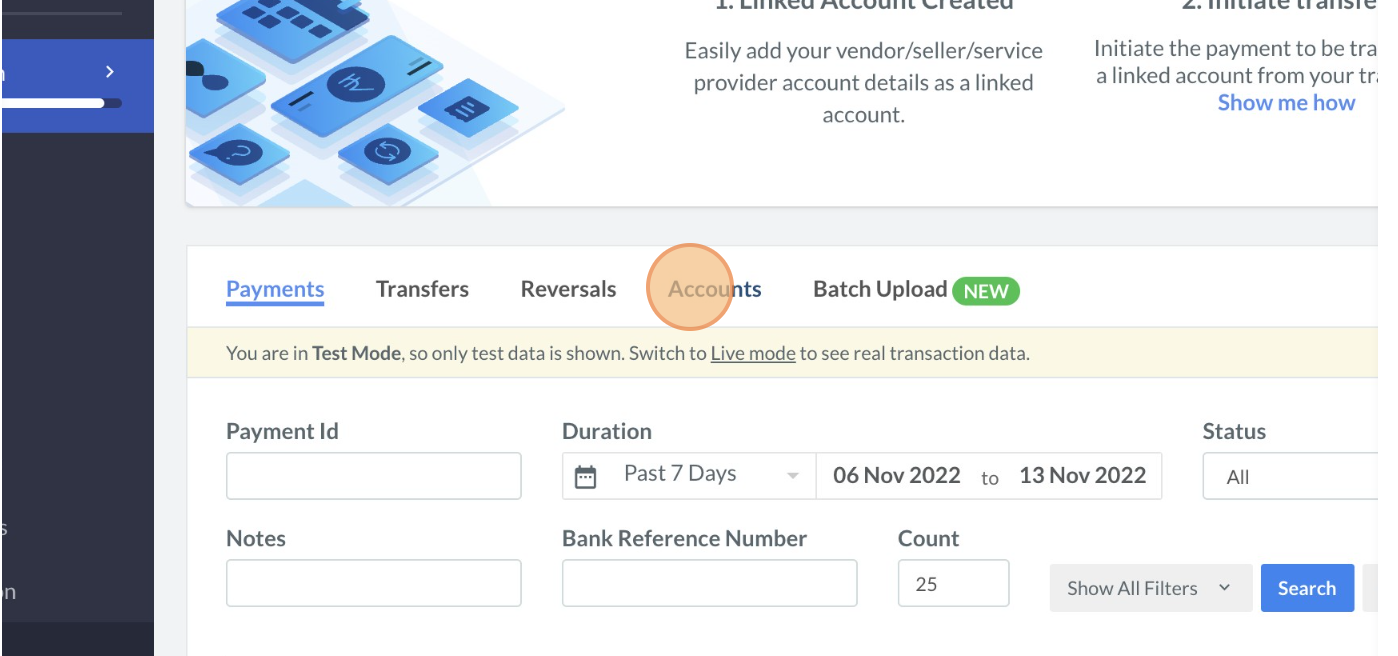
2. Click on "Accounts"
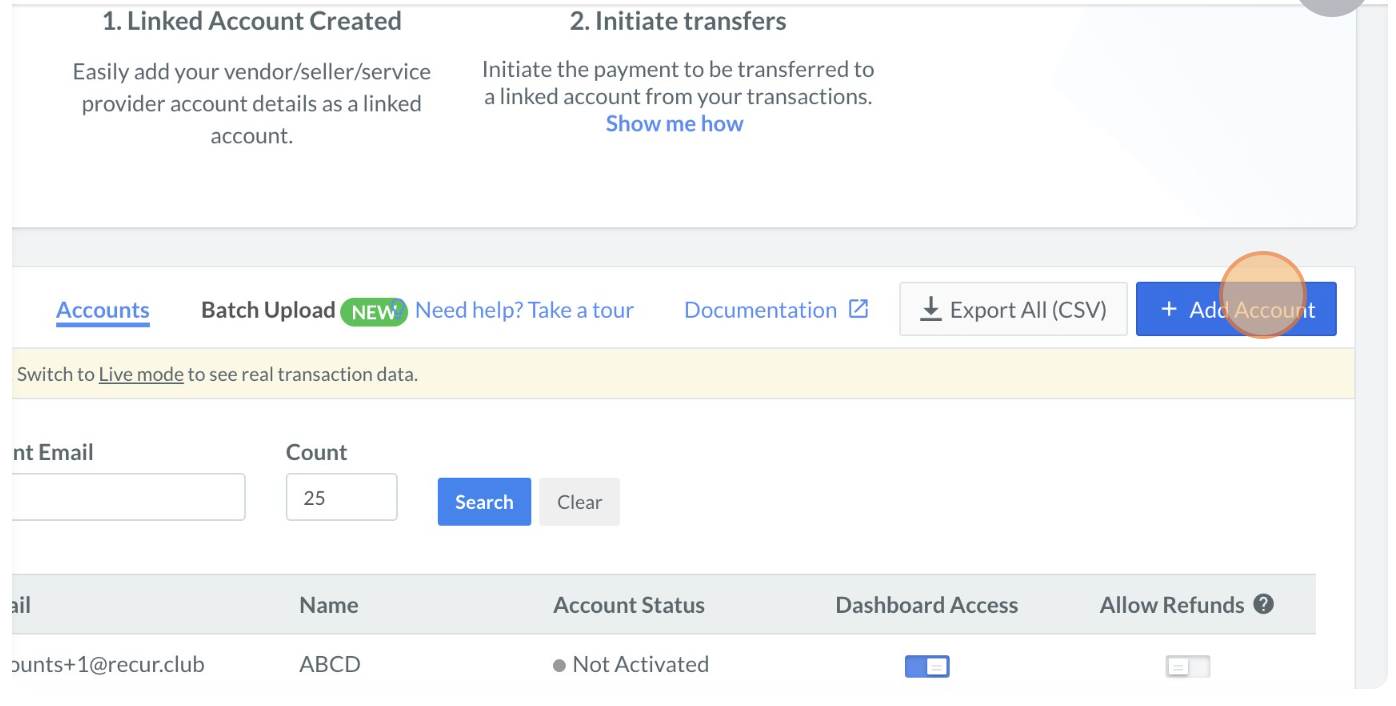
3. Click "+ Add Account"
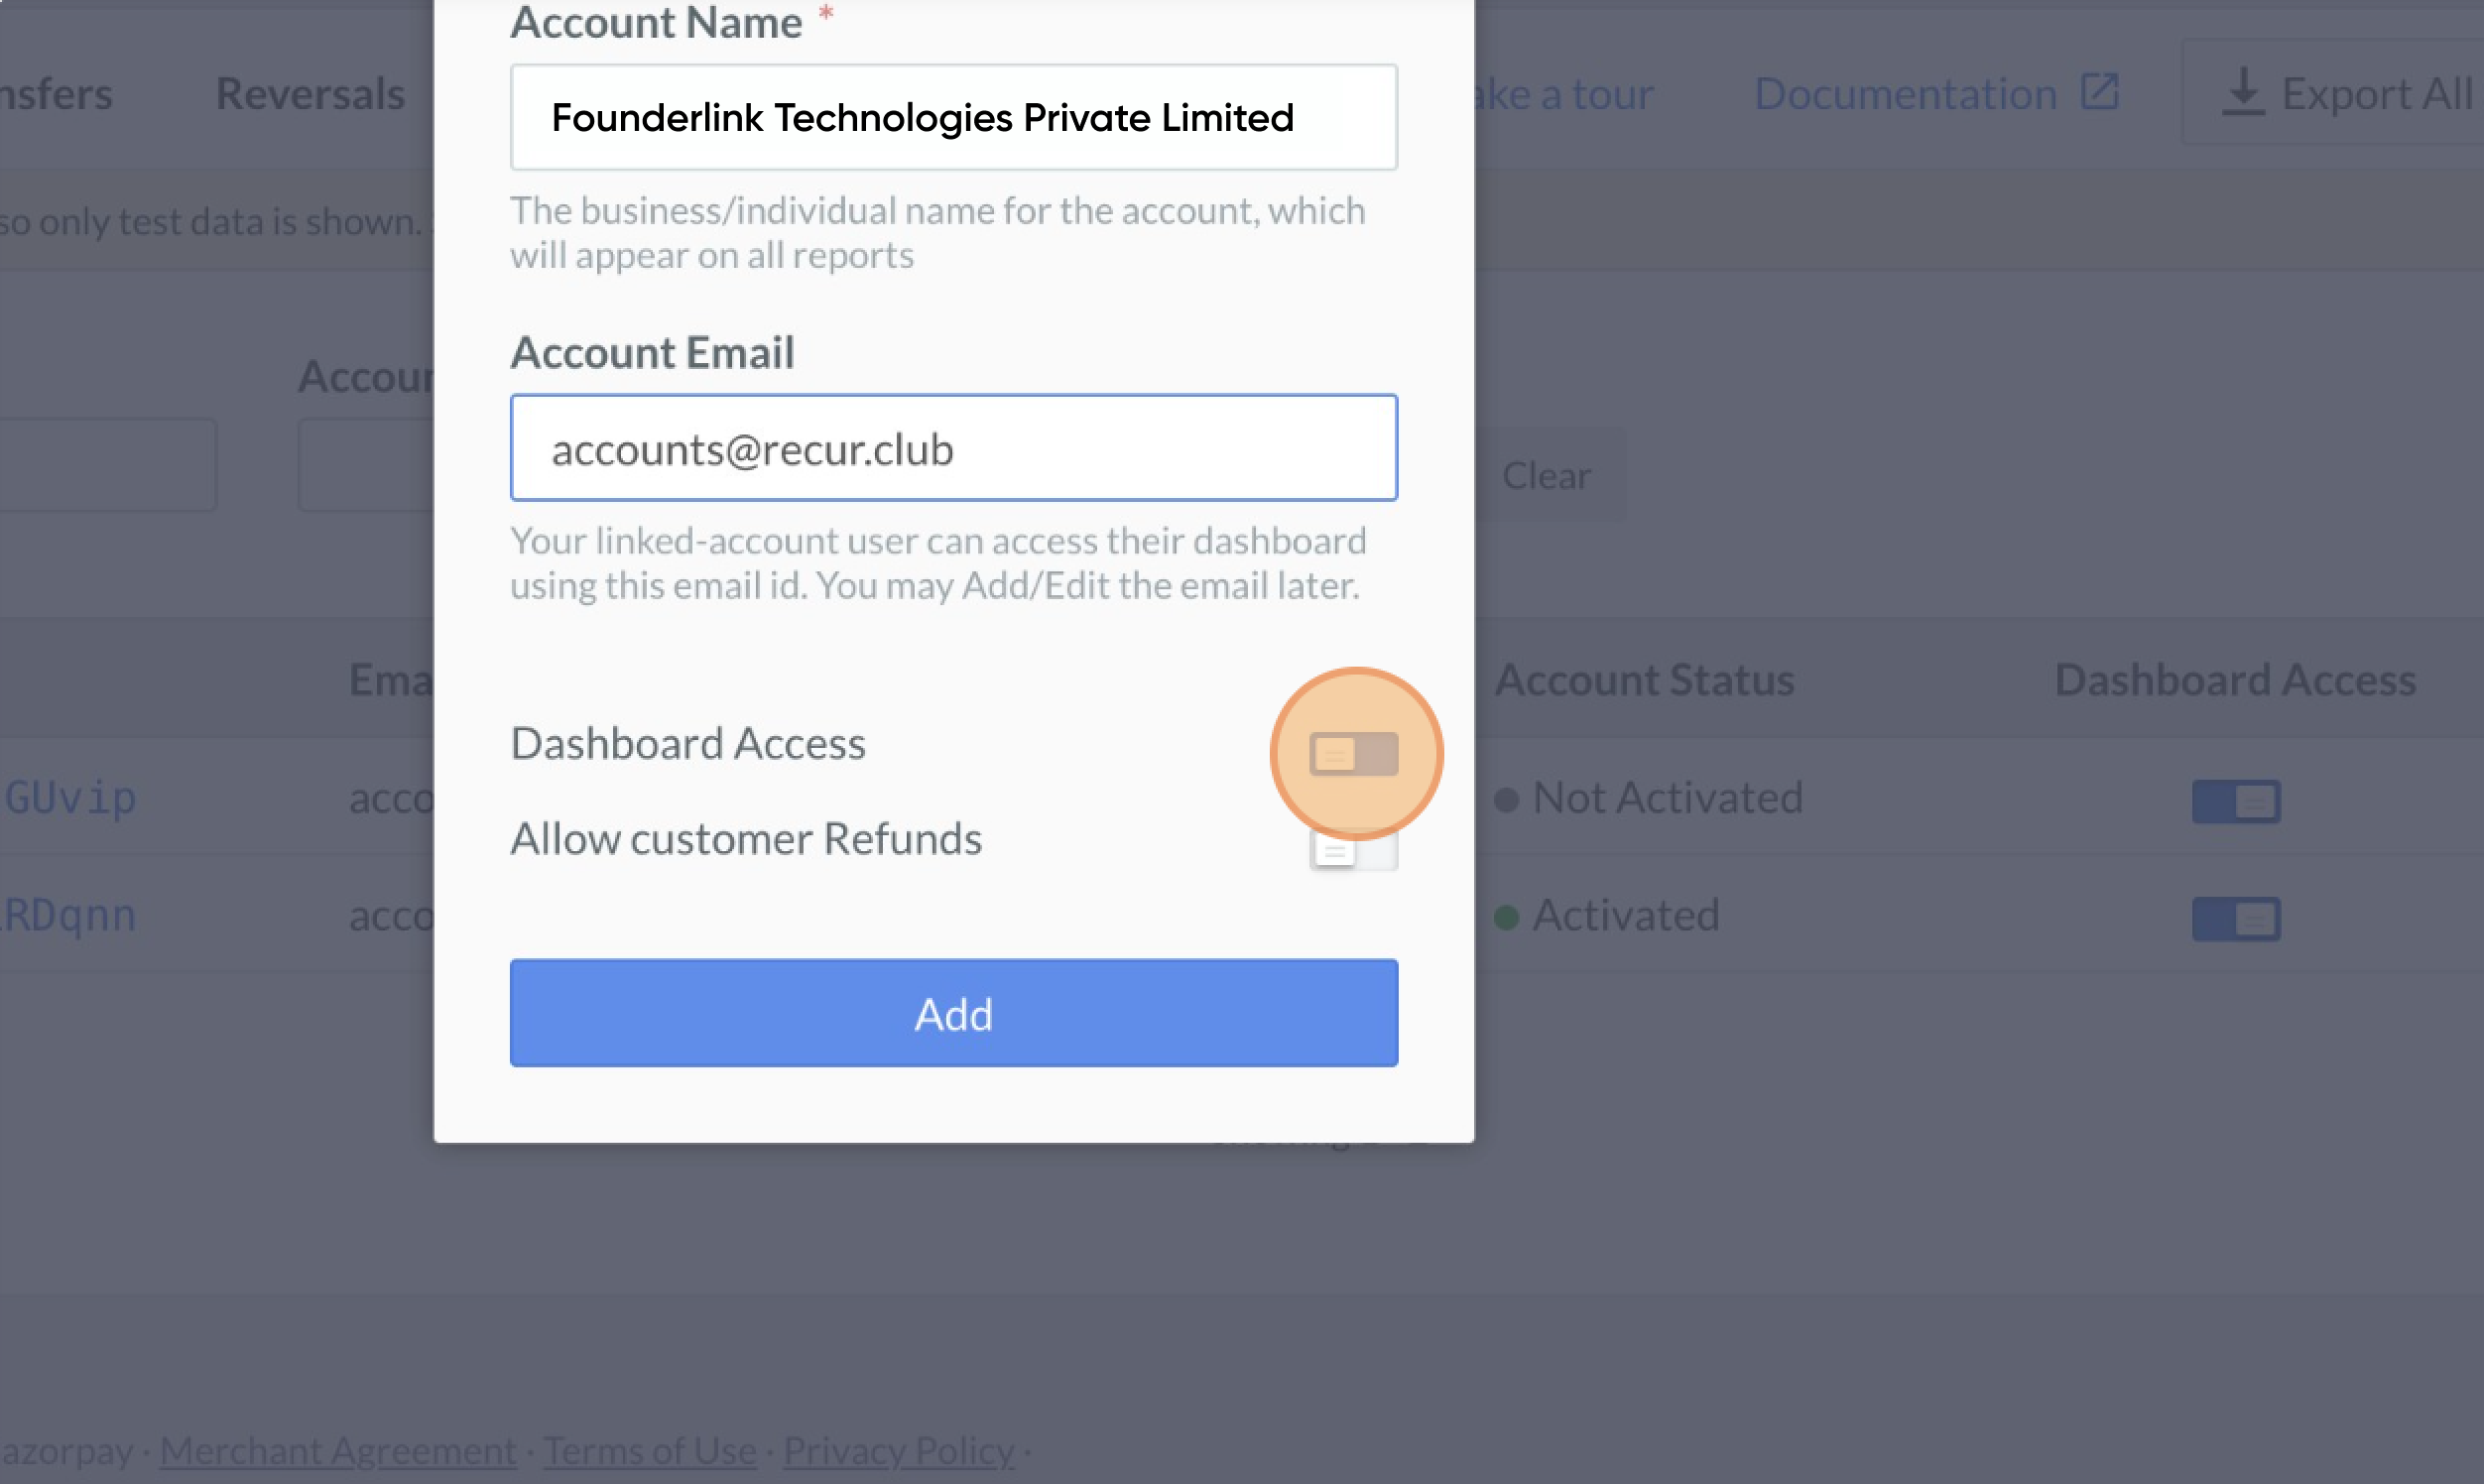
4. In the Account Name - type "Founderlink Technologies Private Limited" and in the Account Email - type "accounts@recur.club". Click on the toggle to provide Dashboard Access and then Click Add
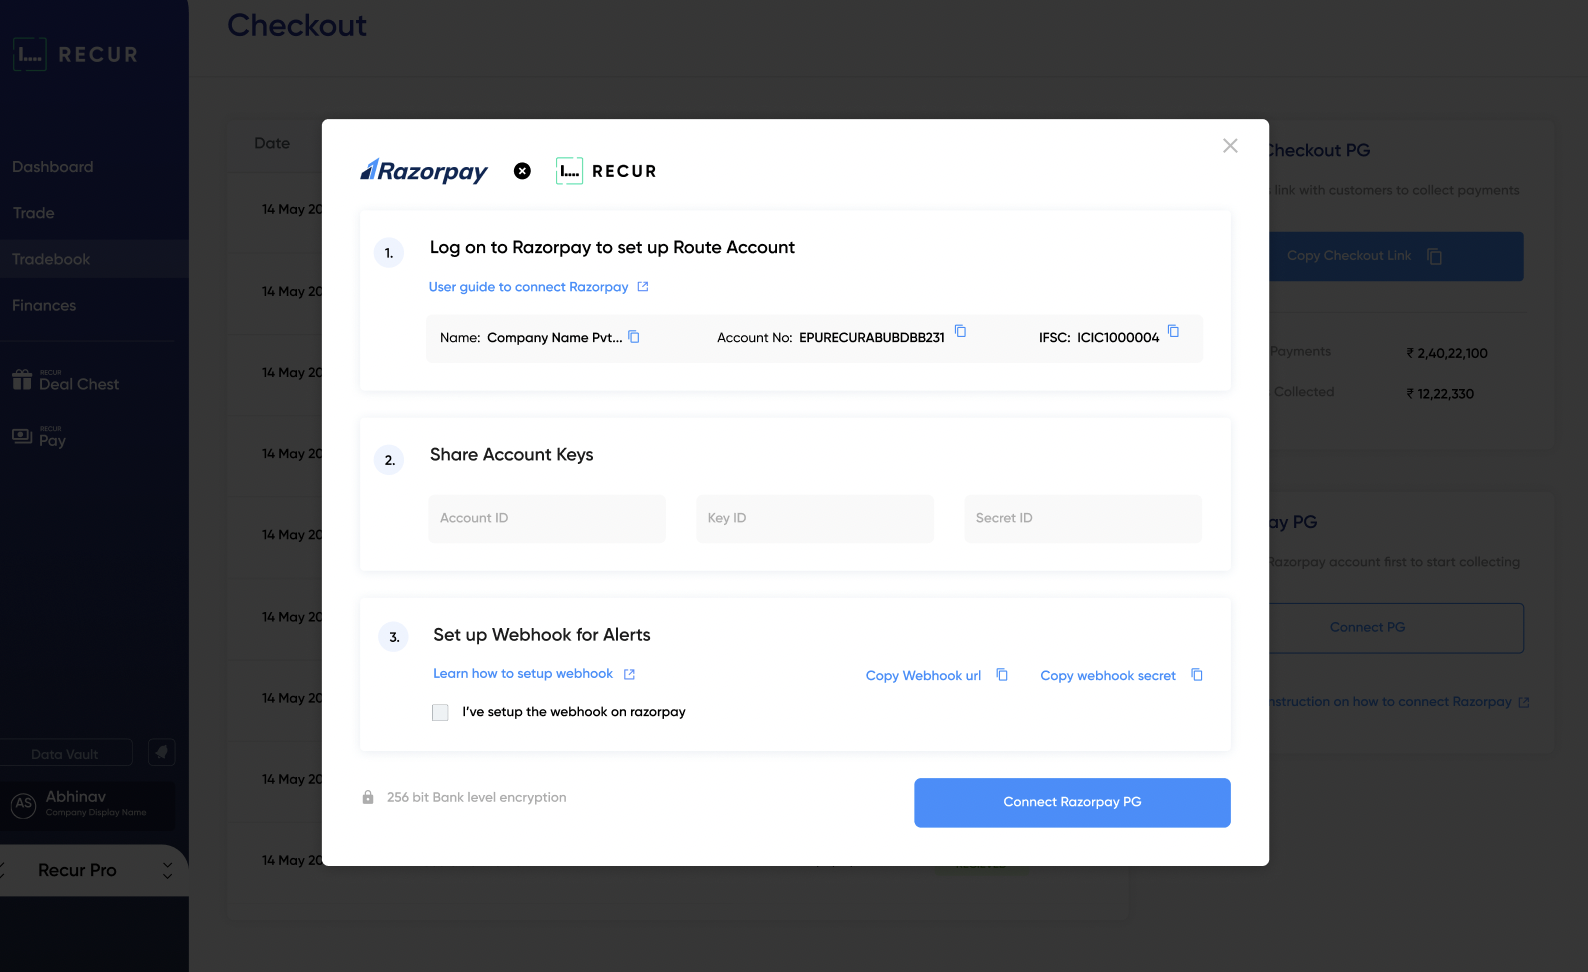
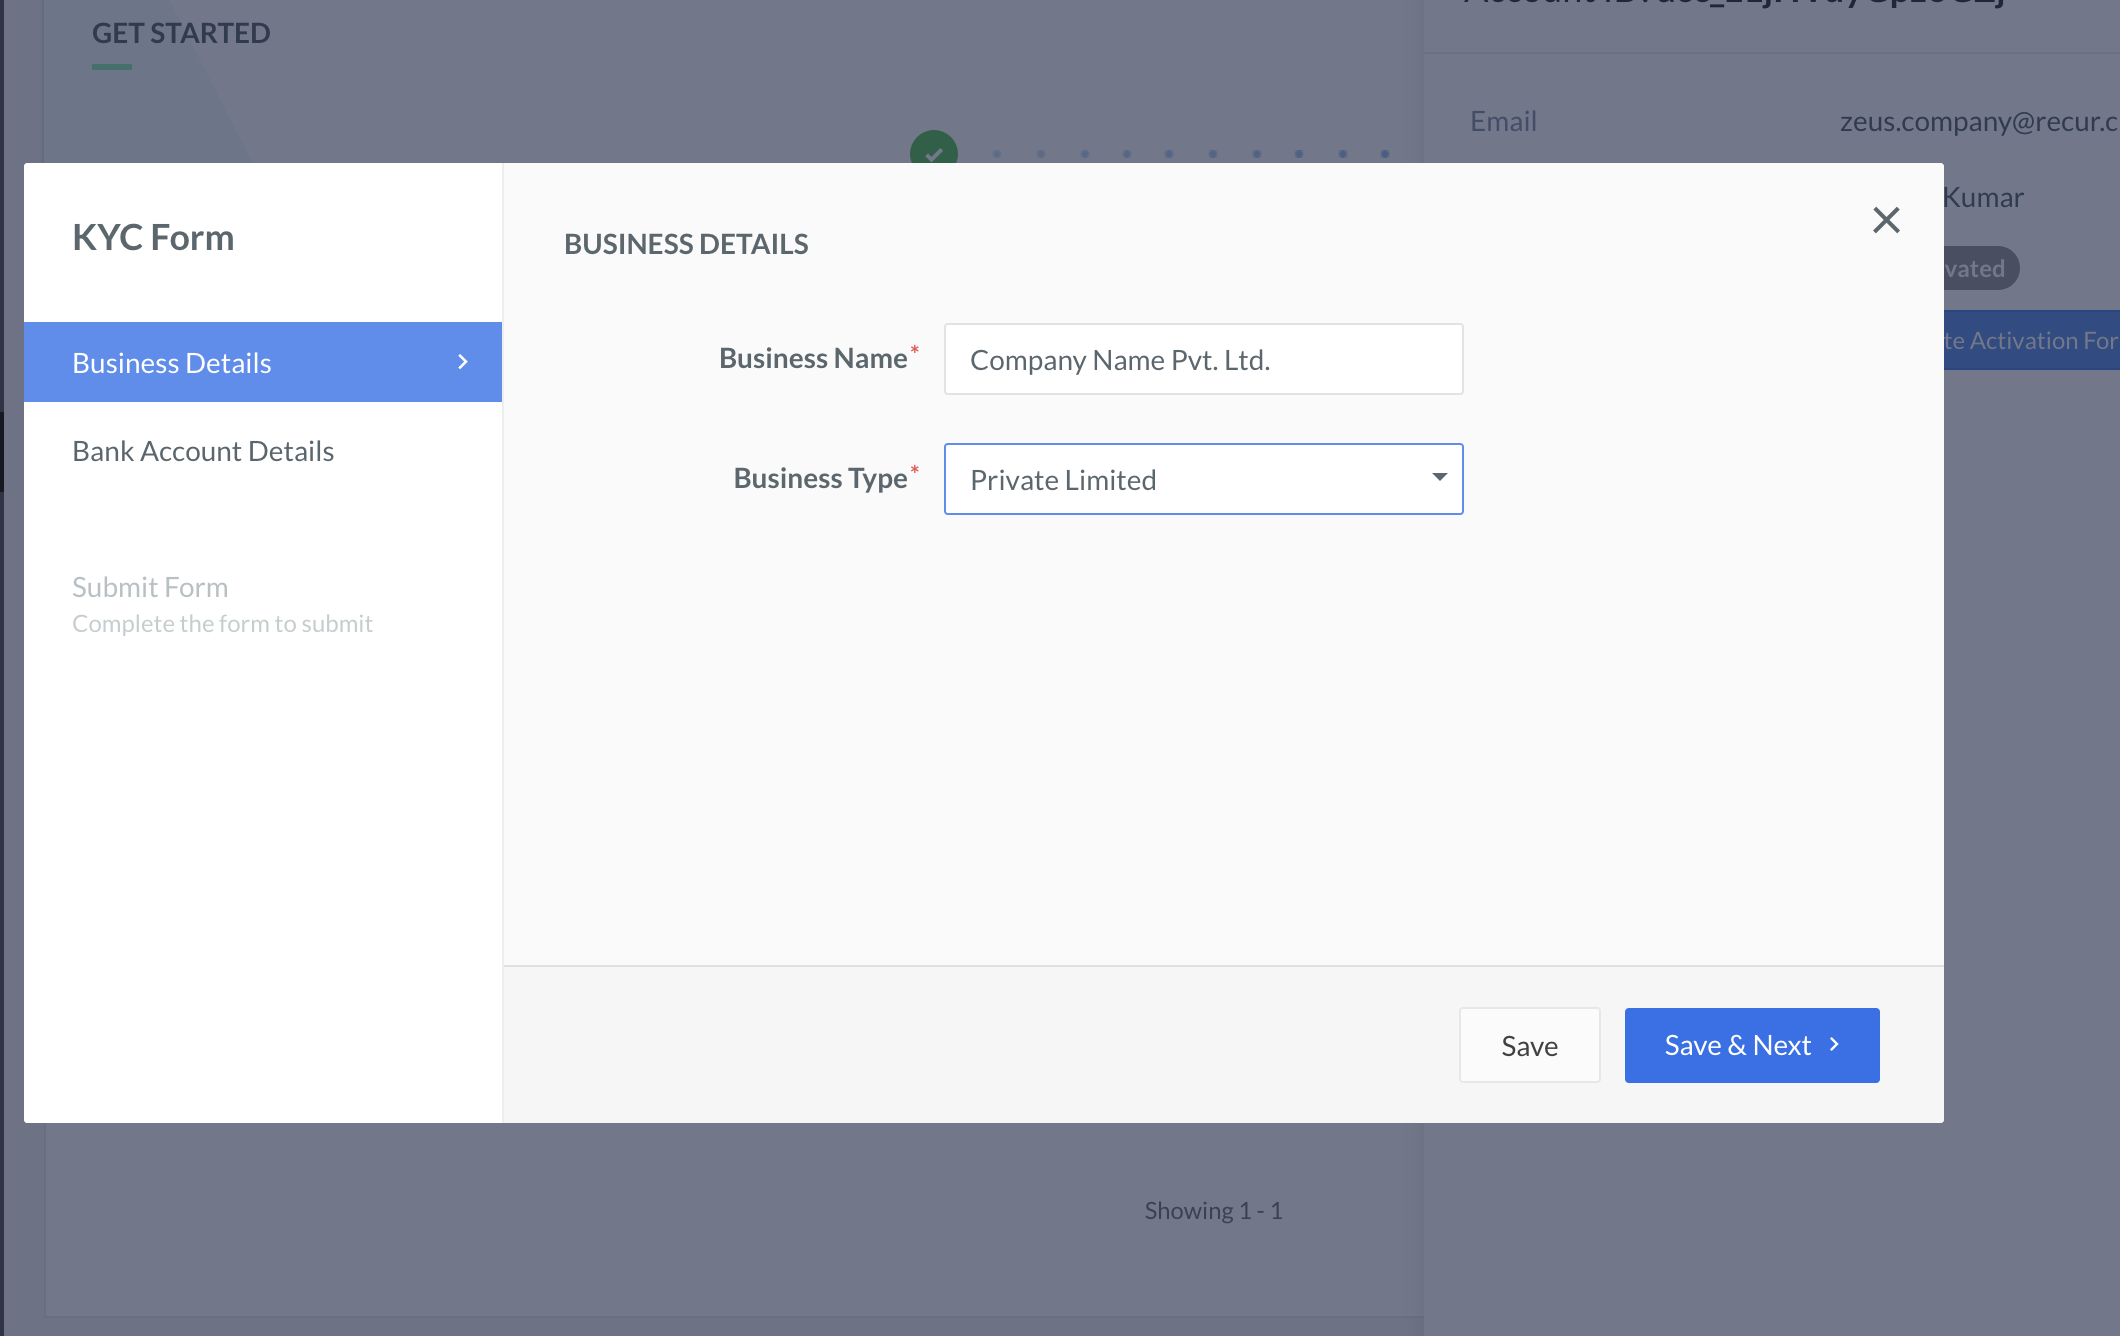
5. Go back to Recur Club and copy your business name from the Modal (as shown below) and paste it in your Razorpay Account.
6. Choose your Business Type and click on Save, followed by Save & Next.
7. Similarly copy your Account No. and IFSC from Recur Club and add in your Razorpay.

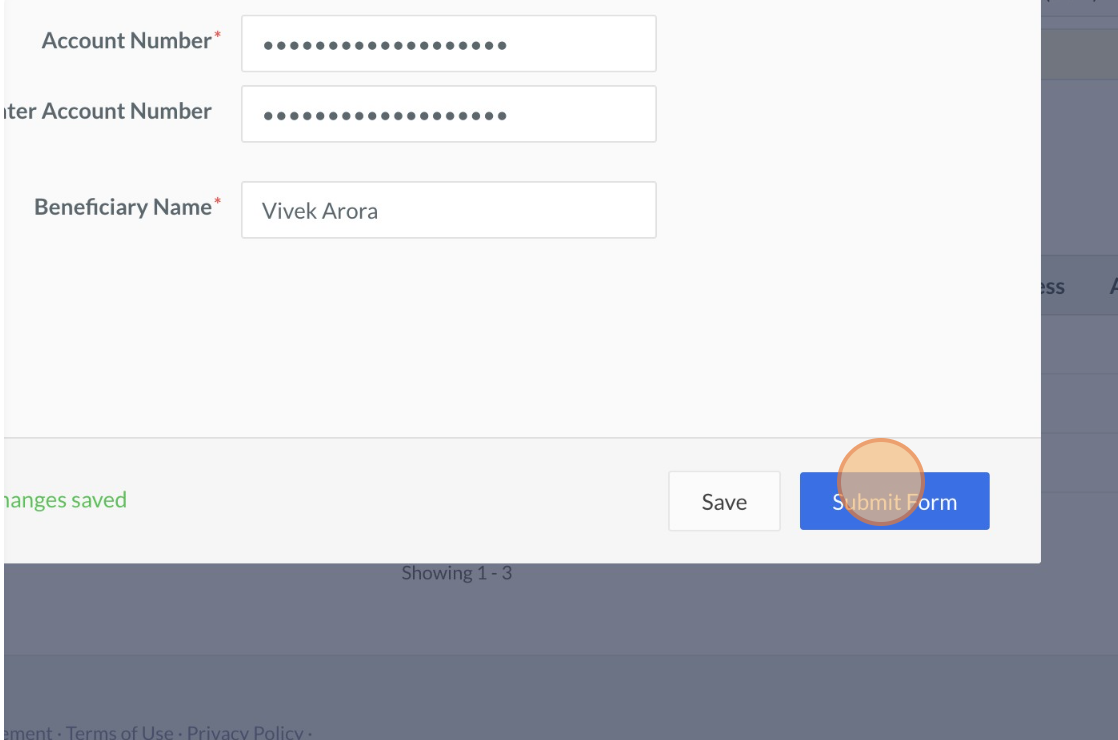
8. After adding your Account Number, IFSC Code, and Beneficiary Name, Click on Save and then Submit Form.
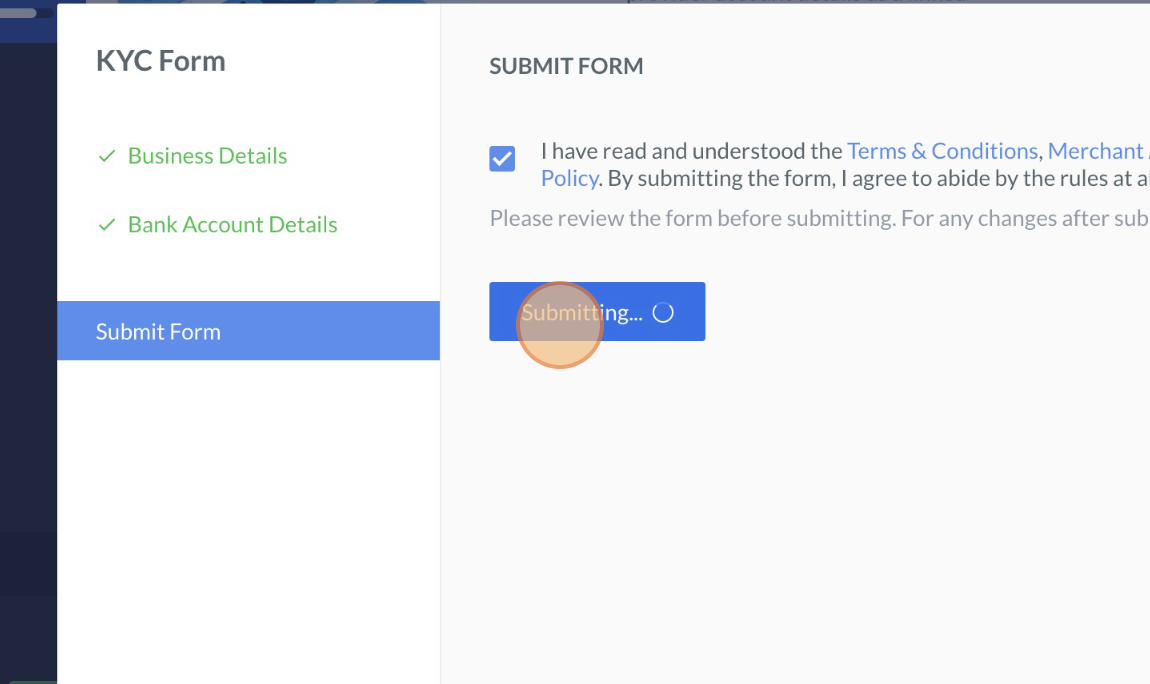
9. Confirm the check box and Submit the Form.
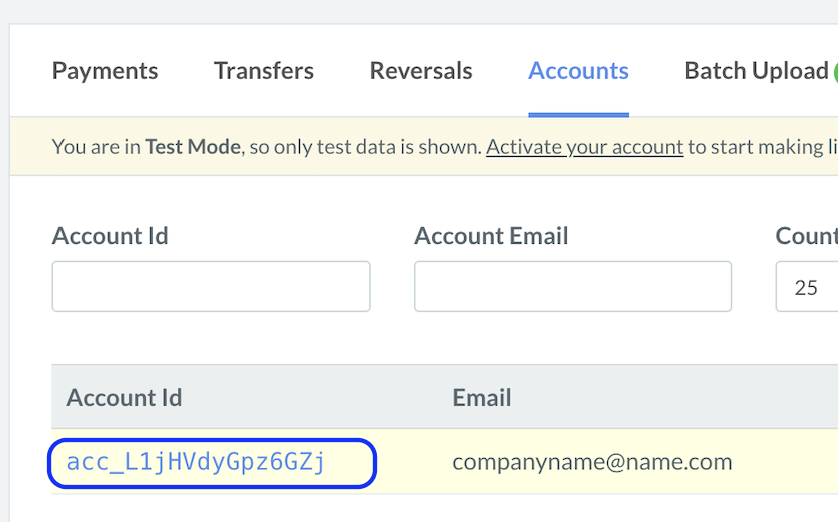
10. Once done, copy the account number generated and paste it in the Recur Platform.
Share your Account Key on Recur Club
Now, go to Settings on the bottom Left, Select API Keys and Copy your Key Id and Secret Id and paste it on Recur Platform.
Note - Secret Id is not shown anywhere in your Razorpay dashboard. You must have downloaded a JSON file before with the filename rzp.csv. In case your tech team uses Razorpay in the code, they must have the secret Id with them.
In case you don't see Key Id anywhere, click on Generate Key.
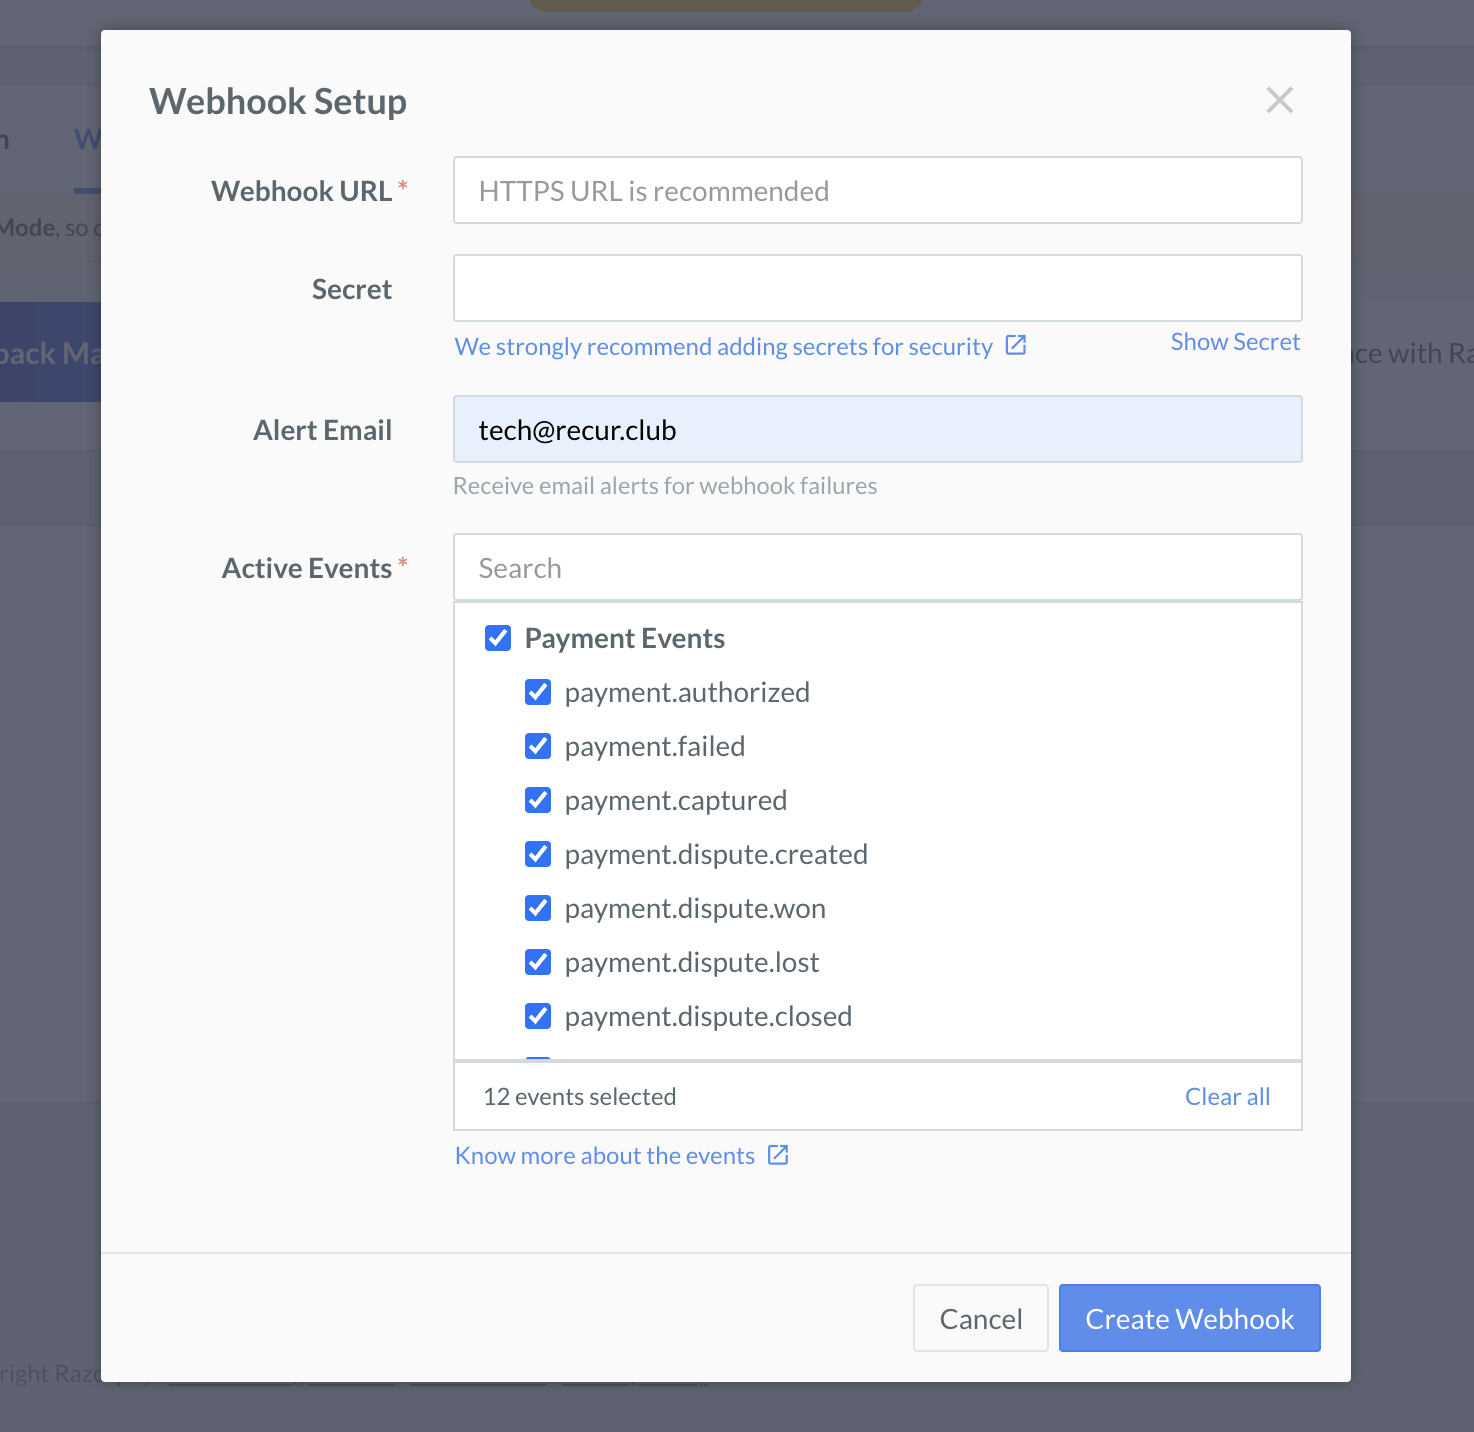
Set up your Webhook
Lastly, go to Webhooks (just on the left of API Keys) and click on Add New Webhook from the top right. In the next step, you can copy the Website URL and Secret from your Recur Website. Put Alert Email as tech@recur.club and select below Active Events.
Settlement Events, Refund Events, Transfer Events, and Payment Events. Once done click on Create Webhook.